Like most guys in the gym, I only focused on trying to get abs, pecs, biceps, and shoulders while neglecting my legs and a decent back workout routine!
Sound familiar?
I never took a good back workout routine seriously and quite frankly, I didn’t know what exercises I needed to do to build a great back.
The truth is, a well-developed and proportioned back contributes significantly to an athletic physique.
This is what my back looked like in Feb 2015.

Soft. Unimpressive. Zero muscle definition.
When I decided to commit to evidence-based exercises for my back, I managed to see dramatic improvements.
Although I still have alot of work to do, this is how far I’ve come with my back workout routine transformation.
This photo was taken in March 2017.

Much better!
But my pose is not symmetrical! Damn… 🙂
So in this article, I’m going to show you how you can achieve similar results without any complicated workout routines, supplements, or long hours in the gym.
Related: Struggling with being skinny-fat? The Push Pull Legs: Ultimate Beginner Guide book is your ultimate solution—get the 4-week plan, expert tips, and proven strategies to build muscle and finally achieve a lean, strong physique. Grab your copy here!
Back Workout Routine Basic Anatomy
Before I share the back-building exercises and sample workout routine to try, let’s take a quick look at four major muscles in your back that you will be training.
- The lats or “wings” (latissimus dorsi)
- Rhomboids
- The Traps
- Erector Spinae (lower back)
Here is a great image from Athlean X that clearly shows the major muscles in your back that need to be trained.

Let’s jump into the exercises that you can use immediately to build muscle thickness and size in your back.
The Best Back Workout Routine Exercises
Let’s have a look at some of the most effective back workout routine exercises that you should be doing as a natural weightlifter.
When I started learning how to do these exercises, I started to see a dramatic improvement in the size, width, and overall muscular definition of my back.
1. The Conventional Deadlift
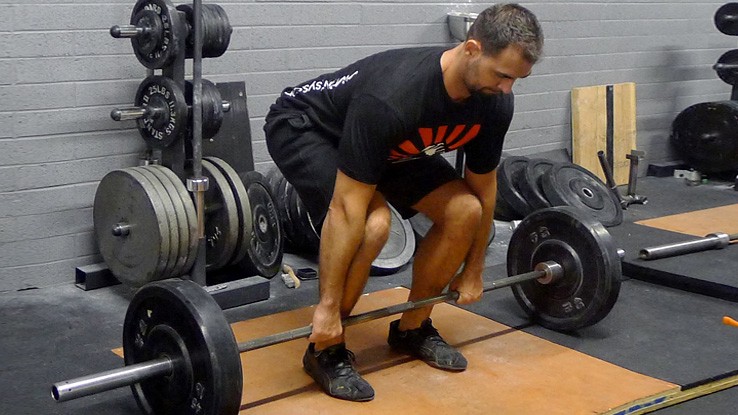
This compound movement is fantastic for targeting virtually your entire back — from top to bottom! If performed correctly, it is the best exercise you can do for developing and strengthening your posterior chain.
The conventional deadlift is setup with feet placed at shoulder width apart and hands placed just outside of the knees.
The conventional deadlift will have the greatest lower back demands — while also requiring the greatest hip and ankle mobility.
I was extremely intimidated by this exercise when I saw it for the first time. However, after spending several months learning how to incorporate it, coupled with a “bulking” diet, I noticed a dramatic increase in my muscular strength and size.
This exercise is an incredible back-builder and is a perfectly safe exercise if you learn and execute the correct technique. There are a couple of studies that have shown that deadlifts are safe for your back and can also help prevent back injury!
If you have a lower back injury then I don’t suggest doing the dead lift. You could try the hex-bar deadlift or sumo deadlift — which are variations of the conventional deadlift. However, in any case, I would consult with a sports physiotherapist and ask if a hex-bar or sumo deadlift should be part of your rehabilitation plan.
How to: Conventional Deadlift.
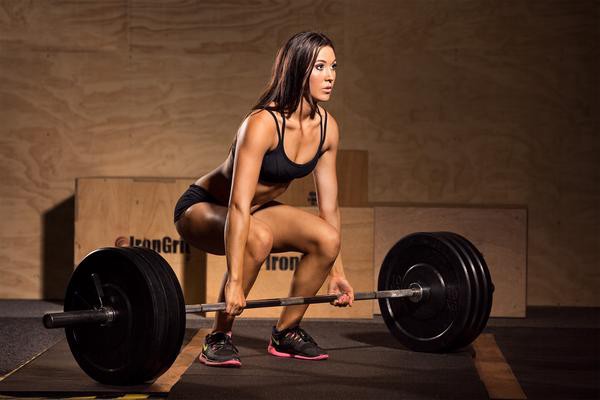
One of the biggest mistakes I see in the gym is the rounding of the lower back during the initial execution of the conventional deadlift. Here is a great video to help you maintain extension through your lower back.
As I mentioned earlier, when I started my journey, I was intimidated by this exercise (and slightly fearful) that I decided to hire a strength and conditioning trainer to show me the ropes.
Several sessions later, I was well on my way to deadlifting independence and I’ve never looked back!
One of the best demonstration videos I’ve ever seen is with Mark Rippetoe, one of the most respected strength training coaches in the industry.
Check out this demonstration video; How to Deadlift with Mark Rippetoe.
2. Sumo Deadlift
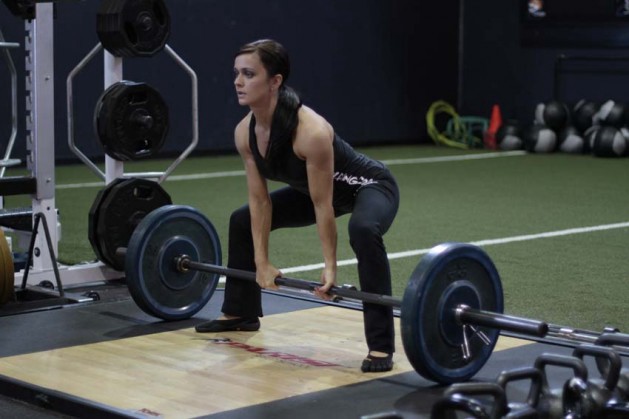
The sumo deadlift was another exercise my first strength coach introduced me to as a popular alternative to the conventional deadlift.
The biggest difference is the sumo deadlift involves a wider foot stance (1.5 to 2 times the width of your shoulders) and hands which are placed inside the knees at shoulder-width apart.
A good reason to do the sumo deadlift over the conventional deadlift is to alleviate the shearing force placed on your spine — perhaps you’ve got a history of lower back problems or a lower back injury.
I suggest trying to sumo deadlift and seeing how it feels. It will definitely hit your quadriceps harder without placing heavy forces on your spine.
Before stepping into the gym and trying this incredible back-builder, watch this demonstration video of the sumo deadlift by Scott Herman:
Definitely give it a try! And now onto the next variation of the conventional deadlift.
3. Hex Bar Deadlift

The trap bar deadlift, or hex bar deadlift, uses a different type of bar which you’ve probably seen in your local gym. You’ll typically step inside the bar and grip the bar at your sides rather than in front of you.
The primary benefit of this deadlift variation is to help improve explosive performance, power output, and force production. Especially if you have a history of back problems!
This variation will place the least amount of stress on your lower back compared to the sumo and conventional deadlift.
If you are a beginner just starting out and your hip and ankle mobility is not too good, this back-builder variation is a great progression to the conventional deadlift.
Here is a great demonstration video by Buff Dudes:
4. Pull-ups & Chin-ups
The body weight pull-up is extremely hard but it will work your entire back (and biceps)!
Research shows that both pull-ups and chin-ups provide the same level of activation in your lats, therefore you should experiment with trying both in your workout routine.
According to the research, the pull-up will emphasise activation in your lower traps and infraspinatus, while the chin-up will activate more of your pecs and biceps.
If you have never done pull-ups before, you’ll probably need to start with an easy variation to build a foundation of strength.
If your gym has an assistance pull-up machine then start with that machine. Focus on doing complete, full range of motion repetitions with control and good form before progressing onto bodyweight pull-ups.
For me, my journey of being able to do 6–7 body weight pull-ups with full control started with spending 1–2 months on the assistance machine (and resistance bands.) After that, I progressed on to achieving my first body weight pull-up! Big achievement 🙂
If you are still feeling stuck and do not have an assistance machine in your gym, I suggest checking out this video. This guy demonstrates 35 different pull-up and chin-up variations! Pick a few variations and try them yourself.
If you are an absolute beginner and need help building the initial strength for bodyweight pull-ups, check out this video by Scott Herman. He walks a beginner through the process of building grip strength first in his forearms and shoulders, before introducing a bench and resistance bands.
When I first started my journey, my strength coach used resistance bands similar to the one Scott uses on his client in the video. You can buy cheap exercise bands from Amazon. Using resistance bands and the assistance machine was how I progressed to bodyweight pull-ups!
Send me a message when you manage to achieve one body weight pull-up 🙂
5. Seated Cable Row (Wide- and Close-Grip)
Here is another great back-building exercise commonly found in many bodybuilder work-out programs.
Check out this Scott Herman demonstration video (using a narrow or “close-grip”):
6. Lat Pulldown (Wide- and Close-Grip)
This exercise has really helped me build out my lats and I highly suggest incorporating them — especially the wide-grip variation. Once again, check out Scott Herman’s informative demonstration video for the lat pulldown where he uses the wide-grip variation.
7. Bent-over Dumbbell Row
Another back-builder that I like which will really hit your lats, traps and rhomboids is the bent-over dumbbell row.
Here is another demonstration video by Scott Herman doing the bent-over dumbbell row:
Personally, I like to use a bench to rest one knee while I do this exercise.
If you are an absolute beginner then I suggest a chest-supported horizontal row variation. According to the literature, this movement will minimise the involvement of your lower back and help to improve the engagement of your upper back muscles.
If you have already been deadlifting then there is no need to add extra training volume to your lower back muscles (erector spinae).
Here is a great demonstration video that will help you get started with the chest-supported row (using dumbbells). You can choose to replace dumbbells with a barbell, for something different.
My Favourite Back Workout Routine
Below is a simple yet very effective back-building workout which I suggest you do 1–2 times per week for the next 6–8 weeks.
If you want, you can incorporate this workout into a push-pull-legs routine that trains your entire body, and perfect for the absolute beginner.
After 6–8 weeks of doing these exercises and being on a bulk meal plan; start a cutting meal plan to reveal your new back muscle definition 🙂
Start with 3 warm-up sets, 10–12 reps each, at 50% of your working weight, before the first exercise on the list.
Conventional Deadlift
3–4 sets of 6–8 reps
Pull-ups (assisted, with bands, or bodyweight)
3–4 sets of 6–8 reps
Bent-Over Dumbbell Row (or chest-supported row)
3–4 sets of 8–10 reps
Lat Pulldown
2–3 reps of 10–12 reps
Aim to achieve a total of 9–12 sets. It is perfectly fine if you can only do 9 sets.
You can change the order of these exercises or incorporate different variations — especially if you start to plateau. As mentioned, if you have poor mobility then you can start with either the sumo deadlift or hex-bar deadlift variations.
Alternatively, assistance pull-ups using a machine or resistance bands are perfectly okay to help you build independence with pull-ups. If you can only do 1–2 reps of assistance pull-ups, that is completely okay. Aim to do 3 reps next time.
The aim is to keep progressing on each of the exercises — rather than just “running the motions” — lifting slightly more weight than the week before.
Back Workout Routine Tips
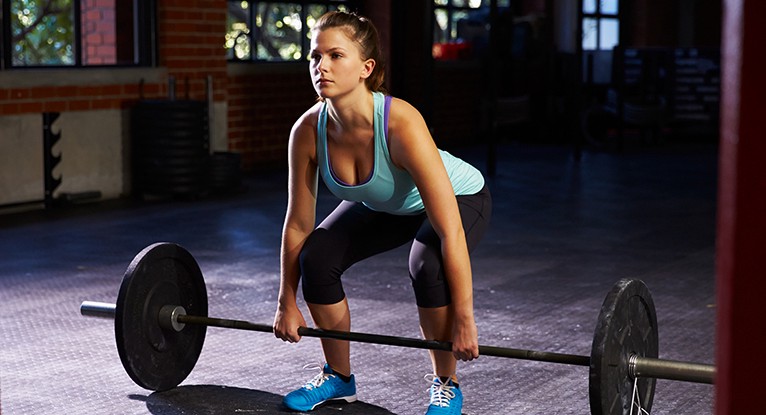
Personally, I like to use an app on my phone called FitNotes to track all of my workouts. This means I can make clear and consistent progress in each of these exercises and, over time, stimulate growth.
In addition, doing a well-constructed back workout routine without consideration to your protein intake and overall caloric intake (i.e., bulking) will mean lackluster gains.
I built size and strength in my back while I was on a bulking diet.
Emphasise Progressive Overload
As I’ve mentioned in other articles, the most important pathway to building muscle is “progressive overload”. Irrespective of the exercise type, if you are not undertaking progressive overload, you will not build any muscle. Period.
This is how I achieve progressive overload in my workouts.
For example, once I reach 8 reps with 200 pounds on the conventional deadlift in the first set — I would add 5 pound plates to either side of the bar (10 pounds total) for the following set.
In the following set, if I am able to do only 6 reps for 210 pounds then this will be my new weight until I reach 8 reps again. Once I reach the upper end of the rep range, I will add extra weight. Rinse and repeat.
If I add the extra weight but can only lift 4 or 5 reps, then I’ve added too much weight and will only add 2.5 pounds to each side of the bar — as opposed to 5 pounds either side.
Sometimes you might need to stick to a specific weight for several back sessions in a row and achieve several sets at the top of the rep range, before adding more weight.
Rest Periods
It is important to rest 2–3 minutes between sets if your ambition is to build strength and size in your back.
I usually use either my wrist watch or the clock on the wall of the gym.
Don’t overlook the importance of rest between sets. The scientific literature clearly states that intra-set rest periods (i.e., 3 minutes) is essential for muscular recovery.
You will be limiting your gains if you overlook this critical detail in your training.
Setting Your Calories and Macronutrient Targets
It would be a grave oversight if I give you the best back-building exercises without any consideration to correct calorie and macronutrient intake.
And a high protein intake, day after day, is not the only ingredient to building a great back. Most people are not aware that overall calorie intake is also a major player!
In short, if you are not getting enough overall calories and protein on a daily basis — you will be sorely disappointed by the end of the 6–8 week back-building program.
In short, once you set up your macros and calories to maximise muscle and strength gains, plug those numbers into a flexible meal plan for bulking, you’ll be well on your way to great results in 6–8 weeks from now.
What Supplements Should I Take?
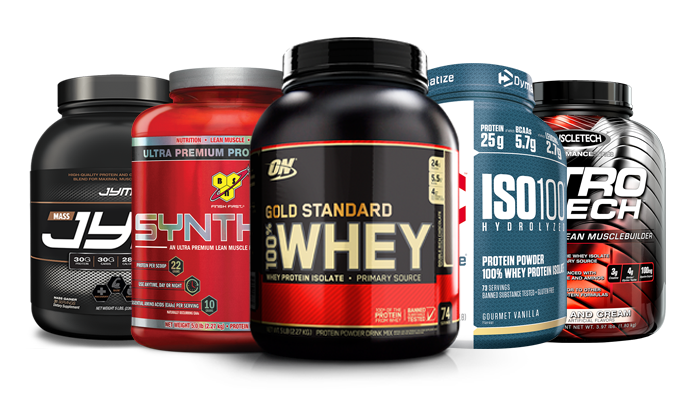
The short answer is… you don’t need to take supplements, provided you have correctly structured your diet and training.
If I were a sponsored athlete, it would be the perfect place in the article to offer discount coupons and a BS rant on the product I was trying to sell.
Most supplement companies produce supplements filled with junk ingredients, proprietary blends, and alluring packaging, to convince you to spend your hard-earned cash.
So while there are no workout supplements that can directly help you build a great back, there are two supplements that I’ve consistently taken over the years to assist in meeting my training goals.
Personally, I am a busy guy that struggles to get all of my protein needs from whole food (i.e., chicken, beef, seafood).
Taking whey protein powder to meet my daily intake requirement has been essential in my workout recovery.
Secondly, creatine monohydrate is the most researched supplement in the sports supplement world. It’s found naturally in the body and in food like red meat.
Hundreds of studies on supplementing with creatine have determined that it will help you build muscle and strength, improve anaerobic endurance, and reduce muscle soreness and damage.
Therefore, if you have good kidney function then I highly recommend that you supplement with creatine monohydrate. Ignore all other variants of creatine as almost all scientific studies have been conducted on creatine monohydrate.
It’s safe, cheap and very effective.
Back Workout Routine Final Thoughts

Although it looks easy — I remember how hard it was to learn the conventional deadlift, sumo and trap bar variations.
It didn’t come naturally to me and I did hire a strength coach for several sessions to build the confidence necessary to do them on my own.
Commit yourself to learning the deadlift. Film yourself in an empty gym using very light weight, if required.
Spend several weeks learning correct form and technique, before worrying about progressive overload.
With a little bit of upfront dedication, you’ll be amazed at your growth in a short 6–8 weeks of commitment.
Make sure you are eating slightly more calories than what your body needs (i.e., bulking) to get the most value out of this article.
Track your workouts and you will get there. Let me know how it goes 🙂
Related: Struggling with being skinny-fat? The Push Pull Legs: Ultimate Beginner Guide book is your ultimate solution—get the 4-week plan, expert tips, and proven strategies to build muscle and finally achieve a lean, strong physique. Grab your copy here!


